Are you tired of staring at the same old, uninspiring decor in your home? Do you yearn for a space that reflects your personality and creativity? It’s time to unlock your inner designer and transform your living space with do-it-yourself (DIY) home decor projects. In this article, we’ll explore the world of DIY home decor, provide you with inspiration, and offer step-by-step how-to guides to help you embark on your creative journey.
The Power of DIY Home Decor
DIY home decor is a wonderful way to infuse your personality into your living spaces while also saving money. It’s about more than just following trends; it’s about creating a home that truly feels like your own. Here are some reasons why DIY home decor is gaining popularity:
1. Personalization
When you design and create your own decor, you have complete control over the colors, textures, and styles that resonate with you. This personalization allows you to craft a home that suits your unique tastes and preferences.
2. Budget-Friendly
Home decor stores can be expensive, and high-quality items often come with a hefty price tag. By taking the DIY approach, you can save money and still achieve a customized look. Many DIY projects use affordable materials and repurpose items you already own.
3. Eco-Friendly
DIY projects often involve recycling and upcycling materials, reducing waste, and minimizing your environmental impact. You can create beautiful decor while being environmentally conscious.
4. Creative Outlet
Engaging in DIY home decor projects is a creative outlet that can be both therapeutic and fulfilling. It allows you to express your creativity, relieve stress, and experience a sense of accomplishment when you see your finished creations.
Now that we’ve discussed the benefits of DIY home decor, let’s dive into some inspiring ideas and how-to guides to get you started.
DIY Home Decor Inspiration
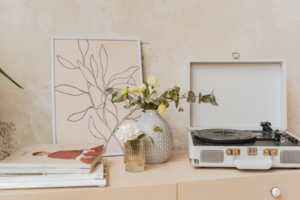
1. Wall Art and Hangings
Canvas Art: Create your own artwork with acrylic paints or markers on canvas. Experiment with abstract designs, geometric shapes, or even quotes that resonate with you.
Macrame Wall Hangings: Macrame is a trendy and versatile craft that can be used to make beautiful wall hangings. You can find tutorials online to learn various macrame knotting techniques.
Gallery Wall: Combine framed photos, artwork, and decorative objects to create a captivating gallery wall. Experiment with different frame styles and layouts to make it uniquely yours.
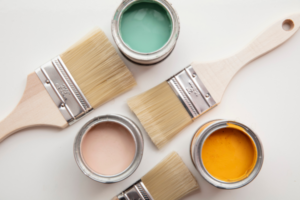
2. Furniture Makeovers
Repurpose Old Furniture: Give new life to old furniture pieces by sanding, painting, or staining them. Consider adding new hardware for a fresh look.
Build Custom Furniture: If you’re feeling ambitious, consider building your own furniture pieces. Start with simple projects like a coffee table or bookshelf and work your way up to more complex designs.
Reupholster Chairs: Learn how to reupholster chairs and sofas to give them a stylish update. Choose fabrics that match your decor theme.
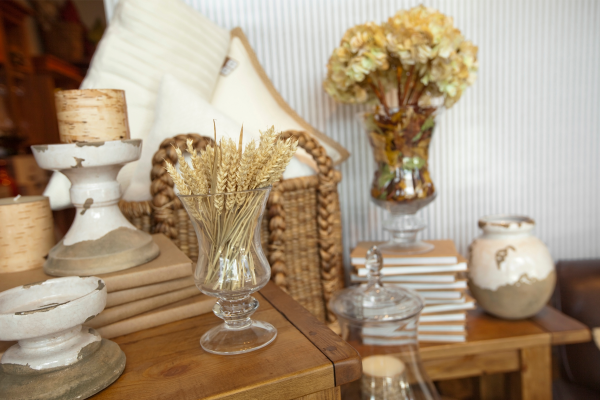
3. Decorative Accessories
Hand-Painted Plant Pots: Add a personal touch to your indoor or outdoor garden by hand-painting plant pots. You can create unique patterns, designs, or even plant-specific labels.
Customized Pillows: Sew or paint your own pillow covers to match your decor. This allows you to experiment with different fabrics and patterns.
DIY Candles and Candle Holders: Craft your own scented candles and decorative candle holders. You can customize the scents and colors to suit your preferences.
4. Lighting Solutions
Mason Jar Chandeliers: Create a rustic and charming lighting fixture by repurposing mason jars as pendant lights. Combine them with Edison bulbs for a warm ambiance.
Paper Lanterns: Craft paper lanterns with intricate cut-out designs and place LED tea lights inside for a cozy atmosphere.
DIY Lampshades: Personalize plain lampshades with fabric, paint, or even decoupage techniques.
How-To Guides for DIY Home Decor Projects
1. Creating Your Own Canvas Art
Materials Needed:
Canvas
Acrylic paints
Paintbrushes
Water
Palette for mixing colors
Steps:
Prepare Your Workspace: Cover your work surface with a drop cloth or plastic sheet to protect it from paint splatters.
Choose Your Design: Decide on the design or theme for your canvas art. You can sketch it out lightly in pencil if you’re unsure.
Select Your Colors: Squeeze out the acrylic paints you’ll need onto your palette. Remember to use water to thin the paint and create different shades if necessary.
Paint Your Canvas: Begin by painting the background color and let it dry completely. Then, start adding details and layers to your design. Don’t be afraid to experiment with textures and brushstrokes.
Let It Dry: Allow your artwork to dry thoroughly before handling it or framing it.
2. Macrame Wall Hanging
Materials Needed:
Macrame cord
Wooden dowel or branch
Scissors
Tape measure
Steps:
Prepare Your Materials: Cut several pieces of macrame cord to your desired length. You’ll need a variety of lengths to create different knot patterns.
Attach the Cords: Fold each cord in half and loop it over the wooden dowel or branch. Pull the ends of the cord through the loop and tighten to secure them to the dowel.
Start Knotting: You can start with simple knots like the square knot or half-square knot. Follow online tutorials for step-by-step instructions on creating various macrame patterns.
Add Beads or Accents: If desired, incorporate beads or other decorative elements into your design.
Finish and Hang: Once you’ve reached your desired length and design, finish off your wall hanging by tying off the cords. Trim any excess cord, and your macrame wall hanging is ready to hang.
3. Furniture Makeover: Painting a Dresser
Materials Needed:
Dresser
Sandpaper
Primer
Paint
Paintbrushes or rollers
Hardware (optional)
Steps:
Prepare the Dresser: Remove any hardware (drawer pulls, knobs) and sand the surface of the dresser to create a smooth, paintable surface.
Apply Primer: Apply a coat of primer to the dresser. Primer helps the paint adhere better and provides a smooth base for your paint color.
Paint the Dresser: Once the primer is dry, apply your chosen paint color evenly to the dresser. You may need multiple coats for full coverage. Allow each coat to dry before applying the next.
Add New Hardware: If you want to update the dresser’s hardware, choose and attach new knobs or pulls.
Finish and Reassemble: Let the paint dry completely, and then reattach the hardware. Your dresser makeover is complete!
Conclusion
Unlocking your inner designer through DIY home decor projects is not only fulfilling but also an opportunity to create a home that truly reflects your personality and style. From wall art and furniture makeovers to decorative accessories and lighting solutions, there are endless possibilities to explore. Whether you’re a seasoned DIY enthusiast or just starting, the key is to embrace creativity and enjoy the process of making your space uniquely yours. So, roll up your sleeves, gather your materials, and let your inner designer shine as you transform your living space into a personalized oasis of creativity and comfort.